Our irreproachable Penitent resumes his painful journey, filled with tears, blood, and redemption. Blasphemous 2 is just around the corner!

Blasphemous 2 officially releases on August 24, 2023, but we’ve had the opportunity to play it, and in this article, we will provide you with a general overview, hoping it can be useful for taking your first steps without giving away any major spoilers.
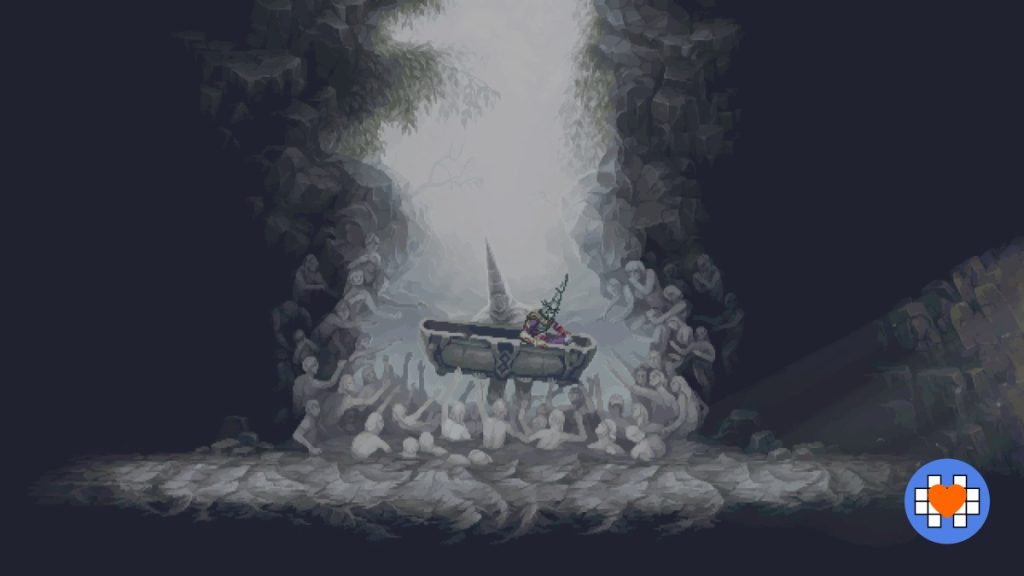
Four years have passed, and finally, our journey into the grim and evocative world alongside the Penitent resumes. So, here we are again, repenting, praying, but above all, fighting.
Just like in the first title, the remains of our protagonist come back to life and set out on a journey, destined as always to fulfill a significant fate.
The thing we immediately notice is the graphical improvement and the choice of 2D animation not in pixel art for the cutscenes, created by the Sunshine Animation Studio. As a result, they appear more pleasing to the eye and, above all, less dark. This might not be considered a good thing by some, but the fact that the graphics are more refined and well-crafted is undeniable.
The initial impression suggests a commercially savvy choice: Blasphemous 2 remains irreverent, dark, and occasionally distressing, but it has been cleaned up and made more accessible.
The Beginning of the Pilgrimage
There are no striking novelties in terms of scenarios and enemies, some are clear tributes, like the stone statue of Redento. Small enemies that have been seen before but are now iconic. We are, therefore, in a familiar reality and can immediately resume the journey from where we left off four years ago.
The first thing we’ll find ourselves doing is choosing a weapon. This is one of the main and most interesting innovations in Blasphemous 2, but I’ll talk more extensively about weapons later in the article.
We immediately face a boss, who arrives suddenly, cutting the face of a statue cleanly. It’s Faceless, the Chisel of Oblivion, who will train us to dodge obstacles, in this case, a large pointed wheel. Here, we also start accumulating Fervor. For those who may not remember or haven’t played the first Blasphemous, Fervor is represented by the celestial bar, beneath the red energy bar.

I’m talking about Sorrows. The first one, the red one, fillable with Bile Flasks, represents the character’s life energy. The second one, the celestial one, is filled by fighting and represents the energy needed to perform a power.
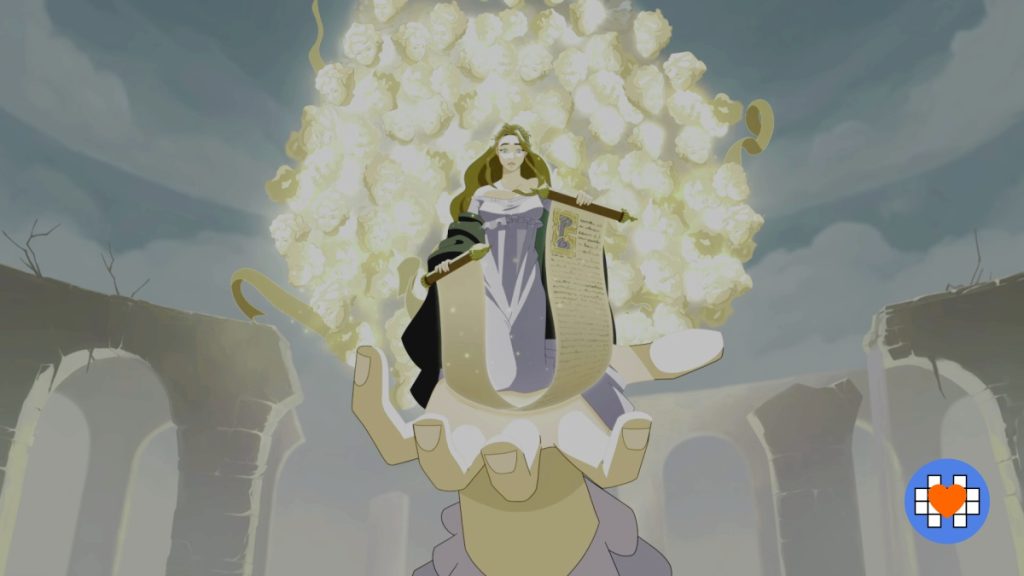
So, let’s begin. We’re at Repose of the Silent One and here we meet a character whose name immediately suggests her purpose: Anunciada. She will be our guide on the path and will immediately tell us who we’ll be dealing with, namely the Archconfraternity.
We have to deal with the three regrets of the three guardians, instilled by the Miracle (yes, it’s it again), so for now, we have a more specific goal.
Our “home” is the City of the Blessed Name, and just like Albero in the first Blasphemous, here we find a place to rest and non-playable characters from whom we’ll collect requests and favors. Among the most important is the master sculptor Montàńes, who stays in his workshop and wants to create his magnum opus, a representation of the Holiest.
The sculptor immediately gives us a sculpture, the Traitor, and it’s the first of a long series that will be placed on the Altar Blades. In exchange for tools, like the Resonating Hammer of the Sculptor, or memories, Montàńes will give us these sculptures that, of course, will be very useful for our Pilgrim in terms of enhancement, as they will increase various percentages, such as damage or resistances. But not only that, when paired in the right way, additional power amplifications are created, called Resonances.

Some Important Helpers
As in the first Blasphemous, here too we will need other important figures, like the one who confesses us, purifying by erasing our sins, the unpleasant consequence of dying. As long as we carry our guilt, we will have thorns that reduce our Fervor bar. In exchange for an increasing number of tears, the confessor will remove one guilt from us, and so on, emptying the vial of purple liquid, located beneath the Laments, which will make us feel guilty until we empty it, paying with tears.
If we are guilt-free, our status will be Immaculatus, but gradually we’ll transition to Afflictus, Gravatus, Cruciatus, and finally, Reus. As usual, Blasphemous instills that sense of discomfort and guilt, and in the end, we find it agreeable to inflict the appropriate punishments on those distributed around. People more or less tormented.
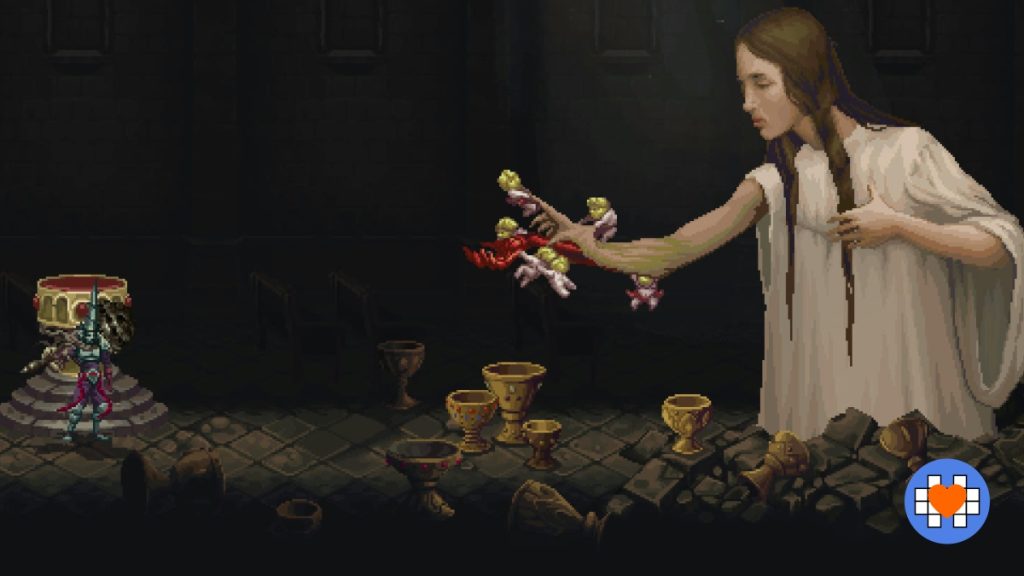
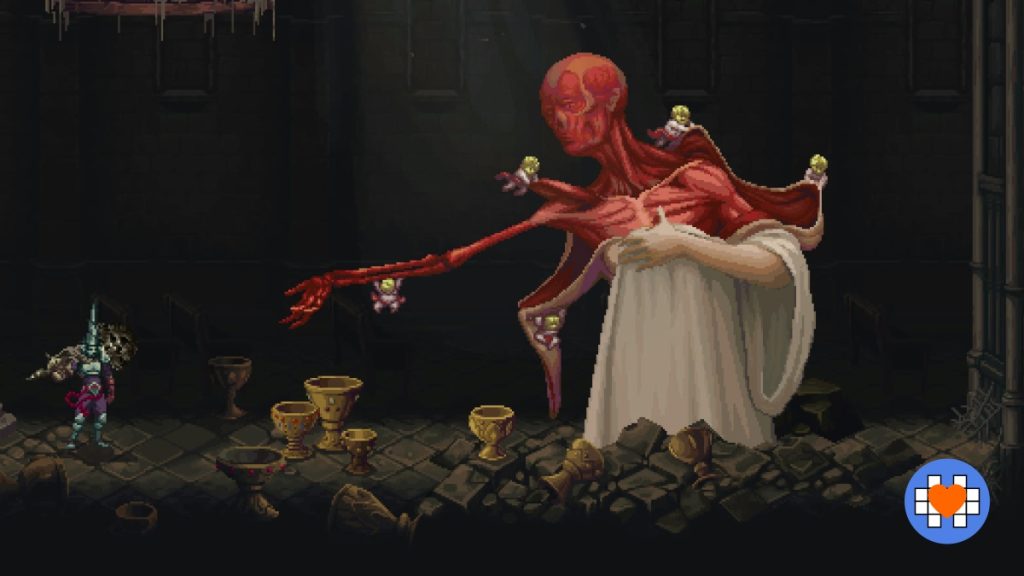
Another important figure, also tormented, who will be of great help, is found in a wing beneath the city, designated for the Sacrifice of Blood. The woman we find will ask us for a blood tribute, but she will give us hers: with every blood sacrifice, we will notice changes in the female figure in question, and the last one we perform will further increase the maximum energy. In exchange for an empty vessel, she will increase their number for us, while giving her a Crystal Fragment will increase the flasks’ capacity. To increase the energy bar, on the other hand, we must deliver a Golden Chalice to the woman.
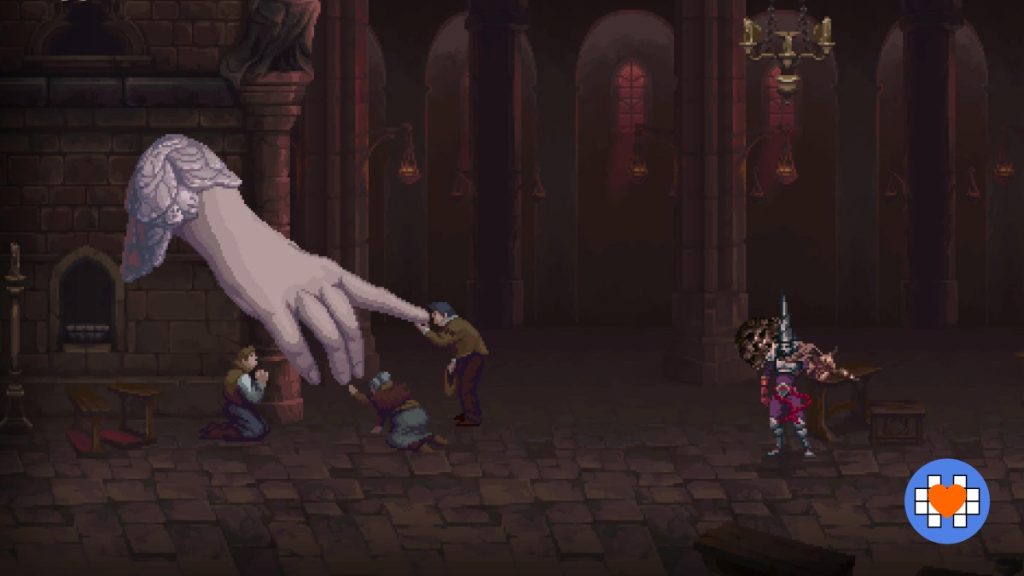
The figure responsible for increasing the Fervor bar is a regal megalomaniacal hand, located in what appears to be a cathedral in Streets of Wakes, which, in exchange for adoration, fervent kisses in particular, bestows this immeasurable grace upon us. The fervent kiss is a piece of cloth from high sanctities, used for cleansing after being kissed on the hands. It’s one of the many key items that we must meticulously find, collect, and bring to their destination if we want to have good equipment.
Another important character we always find in Streets of Wakes is Sagrario, the one who will take care of our rosary beads and their respective knots, which we must find and bring to her. She will unlock the mystery each time, providing us with additional spaces to insert our beads.

The rosary beads are twenty-seven in total, and each one grants increased resistance to various elements such as fire, miasma, lightning, and so on. There are multiple beads designed for the same purpose, but with greater value. There are also beads that increase the number of Tears of Atonement, like the Blood Price, or increase the Martyr Points, another important element I will discuss in the chapter on weapons.
Other important figures that help us create the right equipment are the various merchants. The first ones we encounter in the City of the Blessed Name, in reality, there are two of them: Medardo and Escolastico, pilgrims and scribes. The first one almost always remains in the meditative depths as penance, while the second one handles the commercial aspects.
We’ll also come across other eccentric merchants, like Regino, who is enclosed behind a gate in an isolated area called Pact of the Desperate in Streets of Wakes, or Regina, of whom we can at least catch a glimpse of a bejeweled arm. She appears after a while in one of the accessible buildings in the City of the Blessed Name.
Map Locations in Blasphemous 2
We list below all the visitable areas on the map of Blasphemous 2:
- Repose of the Silent One
- Ravine of the High Stones
- City of the Blessed Name
- Profundo Lamento
- Sea of Ink
- Grilles and Ruins
- Choir of Thorns
- Mother of Mothers
- Aqueducts of the Costales
- Garden of High Choirs
- Sacred Entombments
- Streets of Wakes
- Palace of Embroideries
- Crown of Towers
- Elevated Temples
- Two Moons
- Beneath Her Sacred Grounds
- Chapel of the Five Doves
- Basilica of Absent Faces
- Labyrinth of the Tides
- The Severed Tower
- Sunken Cathedral
- Crimson Rains
What we can do to fulfill our mission: the Weapons
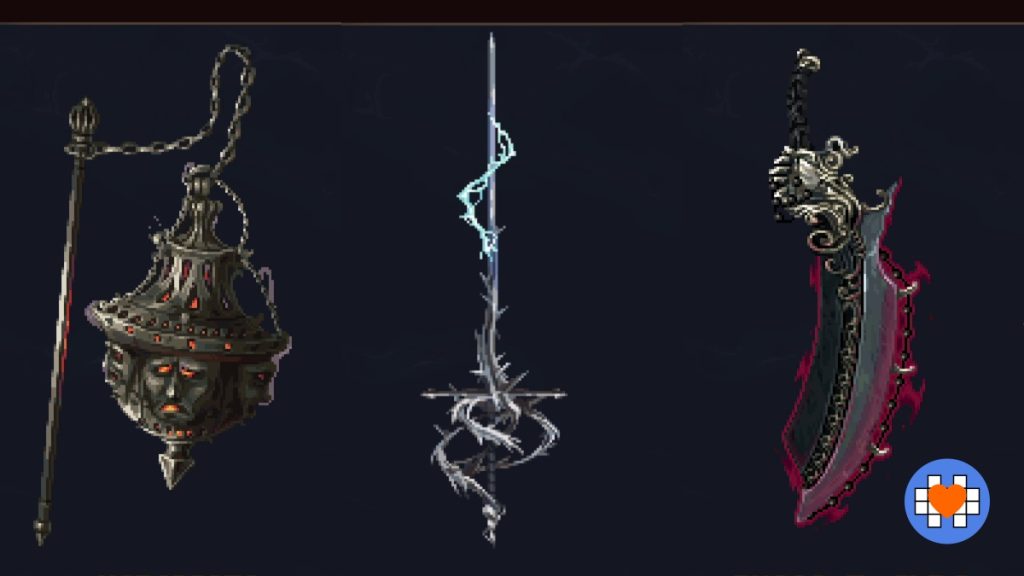
Unlike the previous title, now we have three weapons. The first one we choose at the beginning of our journey, as already mentioned.
The weapons are: Veredicto, a sort of flail, the slowest but most powerful weapon, with an initial damage of 22. Then there’s Ruego al Alba, a large sword with an initial damage of 12. Finally, Sermiento and Centella, a fast and agile dual sword, with an initial damage of 9.
Each weapon has a special ability useful for unlocking passages. Veredicto, which if not chosen at the beginning, is found in Sacred Entombments, allows us to ring large bells whose sound waves materialize ice platforms on which we can climb, or it allows us to cut the “soul” of certain metal columns.
Ruego al Alba, thanks to the move Weight of Sin, found in Crown of Towers. By pressing the “down” button and square while in mid-air, you perform an ascending attack. If executed from a great height, a more powerful version is unleashed, capable of breaking through certain barriers.
Sermiento and Centella, found in Palace of Embroideries, allow us to pass through closed passages by striking specially positioned mirrors.
Each weapon has three levels of upgrades, called Weapon Memories:
Veredicto has the base ability Thunder of Mercy, to charge and attack with more power, and Embers of Faith, which adds fire damage using the R1 button.
In the first level, we have: Tempered Flames, by pressing R1 again, Veredicto is deactivated and no longer consumes the Fervor bar; Determination, which increases basic defense; Ignition Strike, which, with R1 after a ground attack, makes the strike more powerful and hits horizontally; Aerial Ignition, can be used to cancel aerial attacks; Fiery Striker, which increases fire damage; Crucible of Faith, halves the weapon’s charge time.
With the second level, unlockable at Elevated Temples, we get: Sanctified Embers, which reduces Fervor consumption; Blessed Bronze, increases damage; Immaculate Harvest, increases Fervor gain with attacks; And the Earth Shattered, which is the Thunder of Piety that generates shockwaves upon impact; Azure Typhoon, with which you can keep the weapon charged in the air and create a powerful aerial attack that hits from both sides.
With the third level, the last one we’ll find and located in Sunken Cathedral, we obtain: Explosive Embers, which creates area damage when the weapon is activated on the ground; Endless Flame, with which you can create a chain of Ignition Strikes by pressing R1; Soul Combustion, with the weapon activated, there is an improvement in charged attacks; Sacred Bronze, increases damage; Venomous Striker, increases miasma damage.
The base powers of Sermiento and Centella are: Sacred Lunge, which is a thrust attack that pierces enemies; Cross Guard, by pressing R1, you immediately adopt a blocking stance and interrupt almost all actions.
In the first level, we have: Piercing Retribution, lightning counterattack if Cross Guard is executed at the last moment; Verdadera Destreza 1, which unlocks the first indicator and adds lightning damage to attacks; Silver Cross, swift cross-cut if struck while in mid-air; Galvanic Striker, increases lightning damage; Silver Storm, a burst of attacks with R1 plus square.
The second level, unlockable at Elevated Temples, grants us: Just Retribution, which increases damage with counterattacks using any weapon; Verdadera Destreza 2; Quicksilver Coating, which increases the gain of Verdadera Destreza; Blessed Silver, increases base damage; Sacred Lunge, enhances the thrust attack, consuming a Verdadera Destreza indicator; Silver Nail, concludes with a powerful assault after the fourth strike, if you repeatedly press square.
In the third level, found in Choir of Thorns, we find: Determination, which increases defense; Sacred Silver, increases damage; Verdadera Destreza 3; Cross of the Tempest, enhances Silver Cross, consuming an indicator; Silver Lightning, increases Silver Storm damage, consuming all indicators.
Ruego al Alba has the base ability Rosary Ward, which blocks enemy attacks with R1 and counters with an attack, and Weight of Sin, as mentioned earlier.
The first level provides: Retribution, a devastating slash if R1 is pressed at the last moment; Blood Pact, activated by holding down R1 and square, with a full bar, to increase all weapon attacks by adding mystical damage; Reaper Rosary, by pressing R1 during Blood Pact, a very powerful and fast slash is unleashed; Mystic Striker, increases mystical damage; Crimson Warmonger, pressing up and square gives you Crimson Ascension, while pressing down and square performs Crimson Cyclone.
In the second level, unlocked in the Chapel of the Five Doves, we have: Relentless Power, increases stagger; Determination, increases defense; Covenant of Atonement, strikes during Blood Pact restore health; Blessed Steel, increases base damage; Weight of Justice, a wave of mystical damage when Blood Pact is executed from a great height; Crimson Cleaver, enhanced stun damage at the end of a combo, by pressing square four times.
The third level, located in Crown of Towers, unlocks for us: Sacred Steel, increases weapon damage; Crimson Advocacy, enhances extra mystical damage; Cold Blood, increases the duration of Blood Pact; Reaper Prayer, halves the cost of Reaper Rosary; Crimson Glaive, increases the power of Crimson Cleaver.
What we can do to fulfill our mission: Relics and Prayers
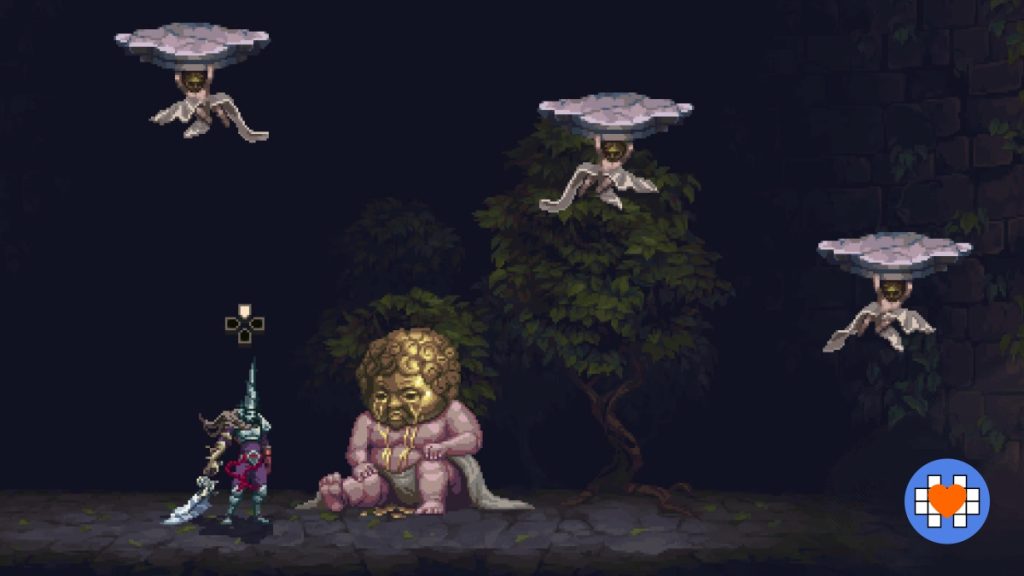
The Penitent’s arsenal doesn’t limit itself to weapons alone. Firstly, we have Relics of Contrition, which, as a metroidvania, Blasphemous gradually grants us during the game. These allow us to acquire abilities that enable us to overcome various obstacles, mainly those related to height.
The first Relic we find is located in Profundo Lamento, and it’s the Ivy of Ascension, which lets us cling to walls and climb.
The second is the double jump, called Ashen Passage, found in the Chapel of the Five Doves.
The third Relic is found in the Basilica of the Absent Faces and allows us to perform a mid-air dash and reach distant surfaces. It’s called Piety of the Wind.
Finally, at the Severed Tower, we find the Protection of Scions, which are suspended hooks in the air held by the brothers of the golden visage. Similar to the first title, we’ll need to collect and bring these to the Guardian of the Garden of High Choirs. We need to collect 33 of them, and the reward is quite substantial, although it will be quite a task.
Prayers, on the other hand, are fire, lightning, miasma, elemental, or mystical powers that are divided into Chants and Quick Verses. The first Chant we encounter is at Ravine of the High Stones, and it’s the Peteneras to the Burial of the Lights a power that conjures flames from the earth, dealing fire damage. It’s activated by pressing the “down” arrow and the circle button. The Verses are more targeted and consume less Fervor compared to the Chants.
First conclusions
The Game Kitchen and Team17 have gifted us with this beautiful new title, staying faithful to the familiar and beloved style and patterns. Enrique Cabeza and Carlos Viola, the creative and artistic director, and the composer and producer of the original soundtrack, respectively, are now a guarantee of quality and originality. The music is as stunning as always, and the landscapes are incredibly captivating.
As mentioned earlier, this title is, for the most part, less grotesque and raw compared to the first one, but there are some interesting exceptions that we will delve into more deeply in our review coming out on the 24th.
In the meantime, warm up your muscles and prepare yourselves for your penance, as the beginning of a new era for the Miracle is about to commence.